So the time has come for your brilliant Expo app to start delivering push notifications. You've had a look at the multiple options available and still you are unsure which one to go for. Regardless where you are at now this is all you need to know before implementing push notifications on your managed Expo app and how to do so in August 2021.
Introduction
Notification gateways
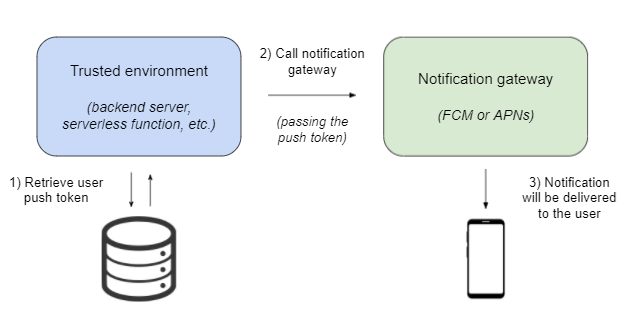
Ultimately notifications reach users' devices through push notification gateways: FCM (Firebase Cloud Messaging) for Android devices and APNs (Apple Push Notification service) for iOS devices. Both gateways are services that expose a Web API for sending push notifications to users through HTTP requests.
We don't need to know more about these gateways but using them is the only way to deliver push notifications to our users. We will need to configure both FCM and APNs credentials and call their APIs for our app to successfully deliver notifications.
Push tokens
A push token is a unique key that identifies an app installed in a specific device. Push tokens are issued by the Apple or Google push notification gateways and allow delivering the messages only to the intended app-device combination. Their format changes depending on the operating system but they look something like 03df25c845d460b...f99cc3edcb63a85ea2ef2.
Server side requirements
Any form of messaging involves a sender and a receiver and, in addition, the sender needs to know the receiver's ID in order to locate them. When it comes to push notifications the receiver's ID is their push token.
Users' push tokens will therefore need to be collected and stored somewhere prior to sending users notifications. While this doesn't necessarily mean you will need a backend server you will certainly need a trusted environment in which to store the push tokens and call the notification gateways API.
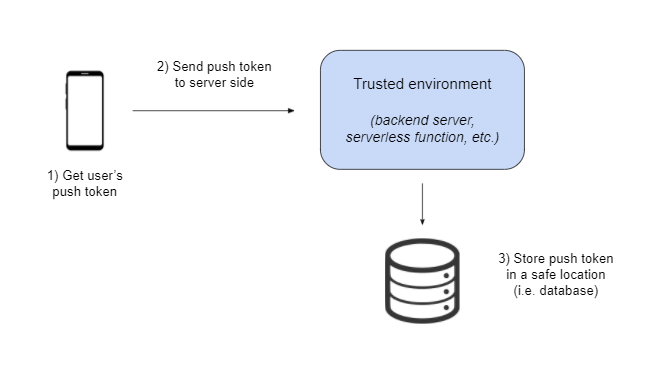
If you are already leveraging a backend infrastructure it's definitely a good place to handle the notification-related operations. If you don't have such infrastructure and you want to keep it simple you can use serverless solutions.
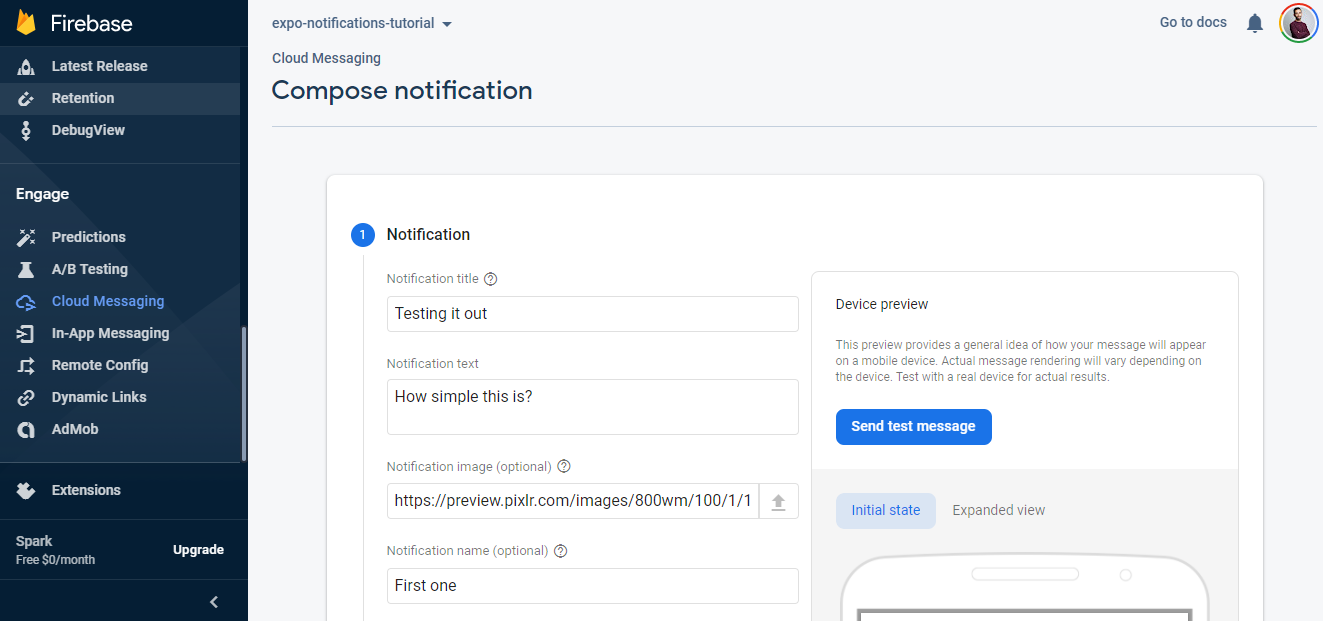
Notifications can also be sent to the entire audience of the app. If you don't need to send notifications to specific users you can then skip collecting push tokens and setting up a server side environment to send notifications from and use a graphical notifications composer tools instead (e.g. Firebase notification composer).
Technical considerations
Push tokens collection: The Expo way
Expo provides a great module for setting up and handling push notifications which not only works like a charm but it is also magnifically documented:expo-notifications. This is the module I'm going to be using to handle push notifications on the client side and it provides two different methods for collecting push tokens:
- getDevicePushTokenAsync: This method returns the device native push token, different for iOS and Android, and that's the token we will need to use when communicating directly with the notification gateways
- getExpoPushTokenAsync: This method returns an Expo push token (something like ExponentPushToken[lBc...ZsM]), a custom token that Expo push notifications service uses to deliver notifications instead of the native push tokens. This is the method we need to use when using Expo's service
Push tokens collection: The Firebase way
Firebase includes a messaging module that can be used to manage push notifications. According to the Firebase documentation, messaging.getToken is the function we need to call in order to retrieve the device push token, which will first ask for notification permissions in case they have not been granted yet.
Unfortunately the Firebase messaging module is not compatible with React native 💔 Long story short trying to call the messaging module will result in an unhandled exception (more details about this issue in this stackoverflow question).
at App.tsx:34:4 in <global>
at node_modules\metro\src\lib\polyfills\require.js:321:11 in loadModuleImplementation
at node_modulesexpoAppEntry.js:3:0 in <global>
- ... 4 more stack frames from framework internals
Expo push notifications service
While communicating directly with the notification gateways Web APIs is a totally acceptable way of sending push notifications I'm going to be using a different approach in this article. As explained in the Expo docs notification gateways direct communication requires handling certain complexity:
- Differentiating between native iOS & Android device tokens
- Twice the amount of code to write and maintain
- FCM and APNs responses error handling
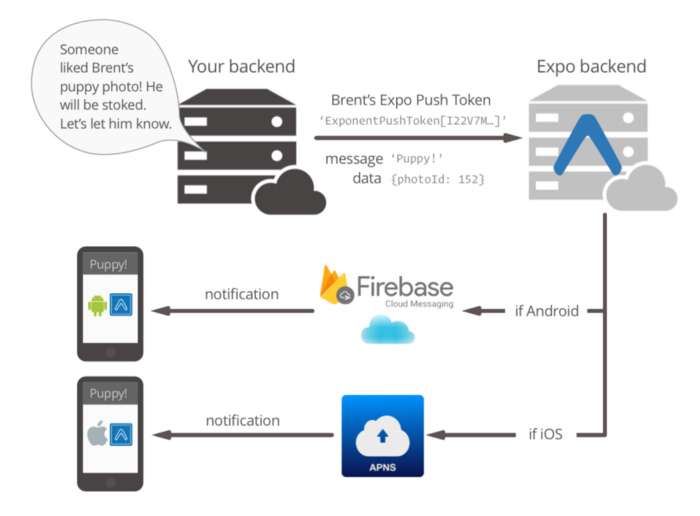
We could of course handle such complexity but Expo happens to provide an iOS-agnostic push notification service that does handle it already. Plus we will be using expo-notifications to handle notifications on the client side so I feel using the Expo push notifications service makes a lot of sense (e.g. the notification data is automatically serialized and deserialized by Expo on both ends). This is how the service works:
Use case
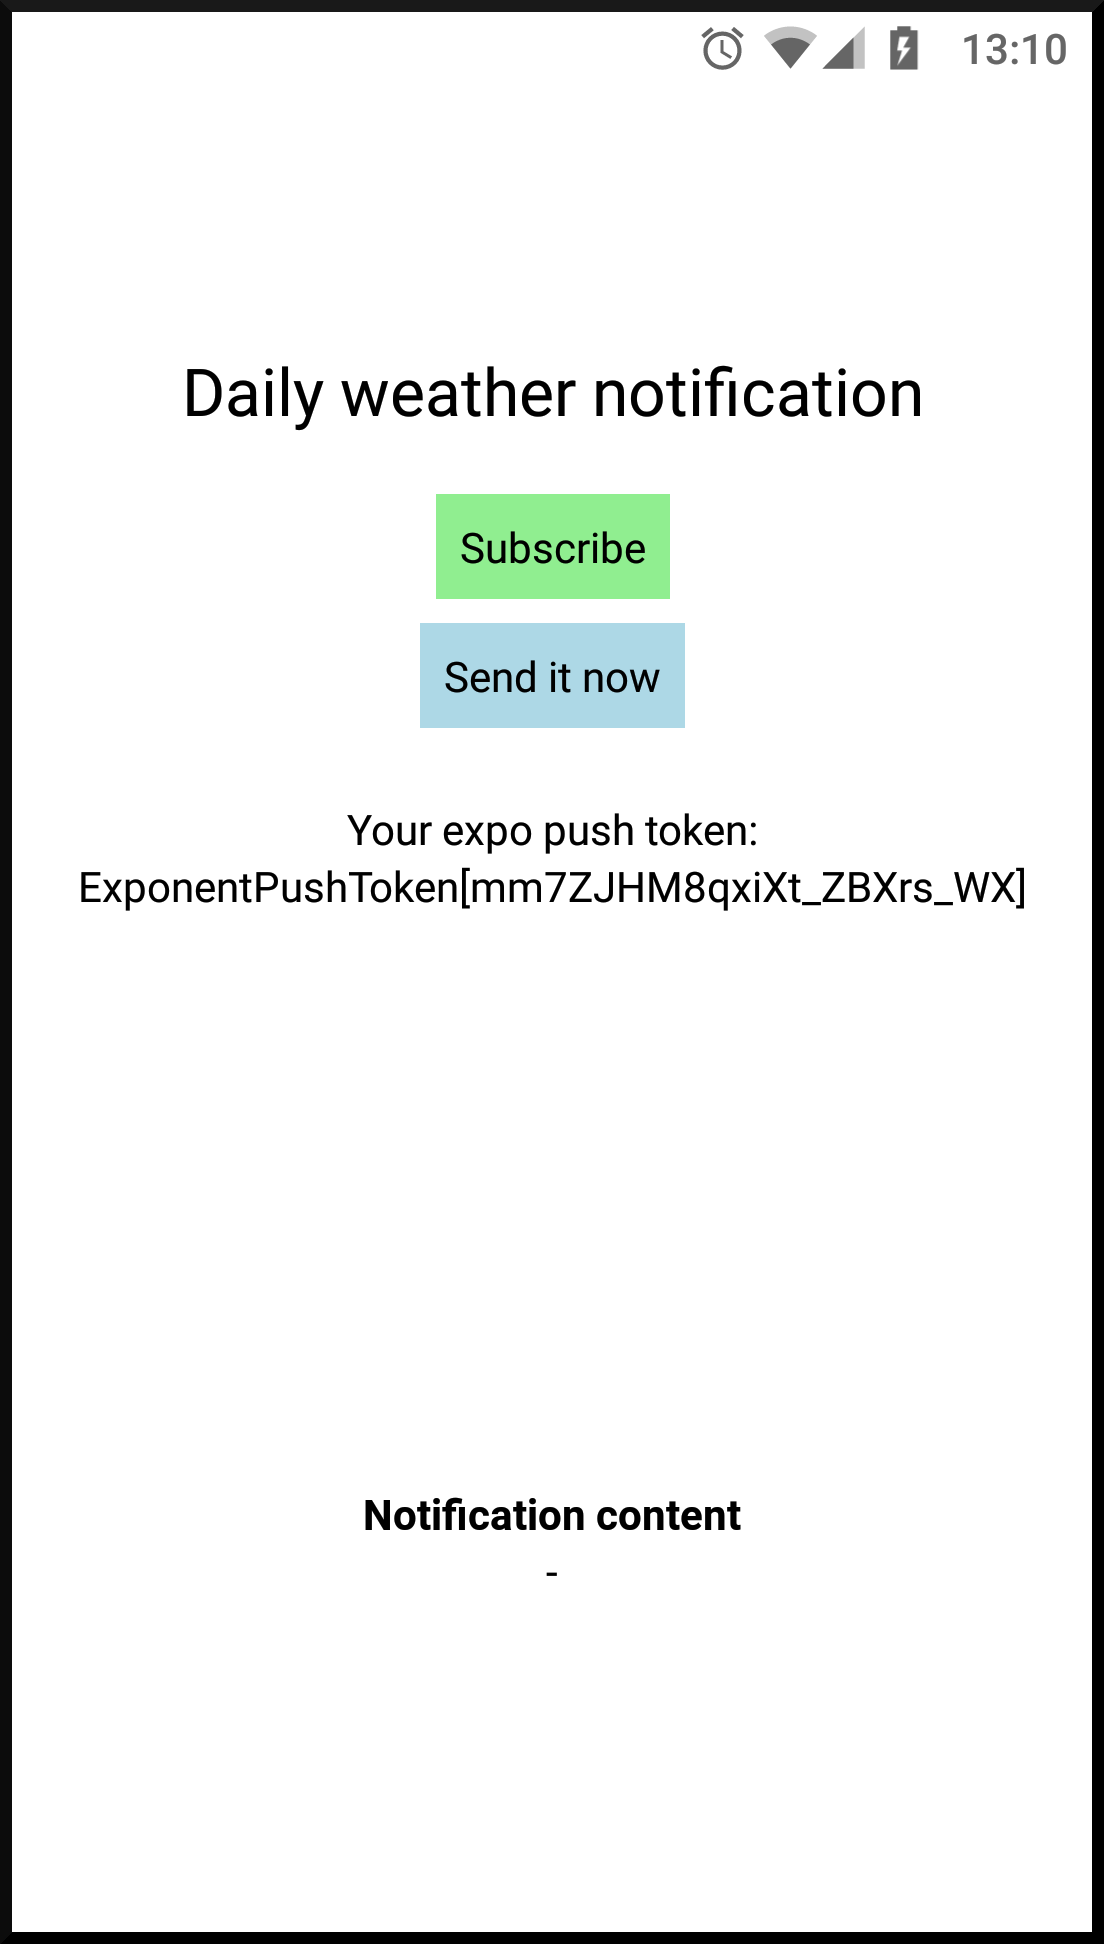
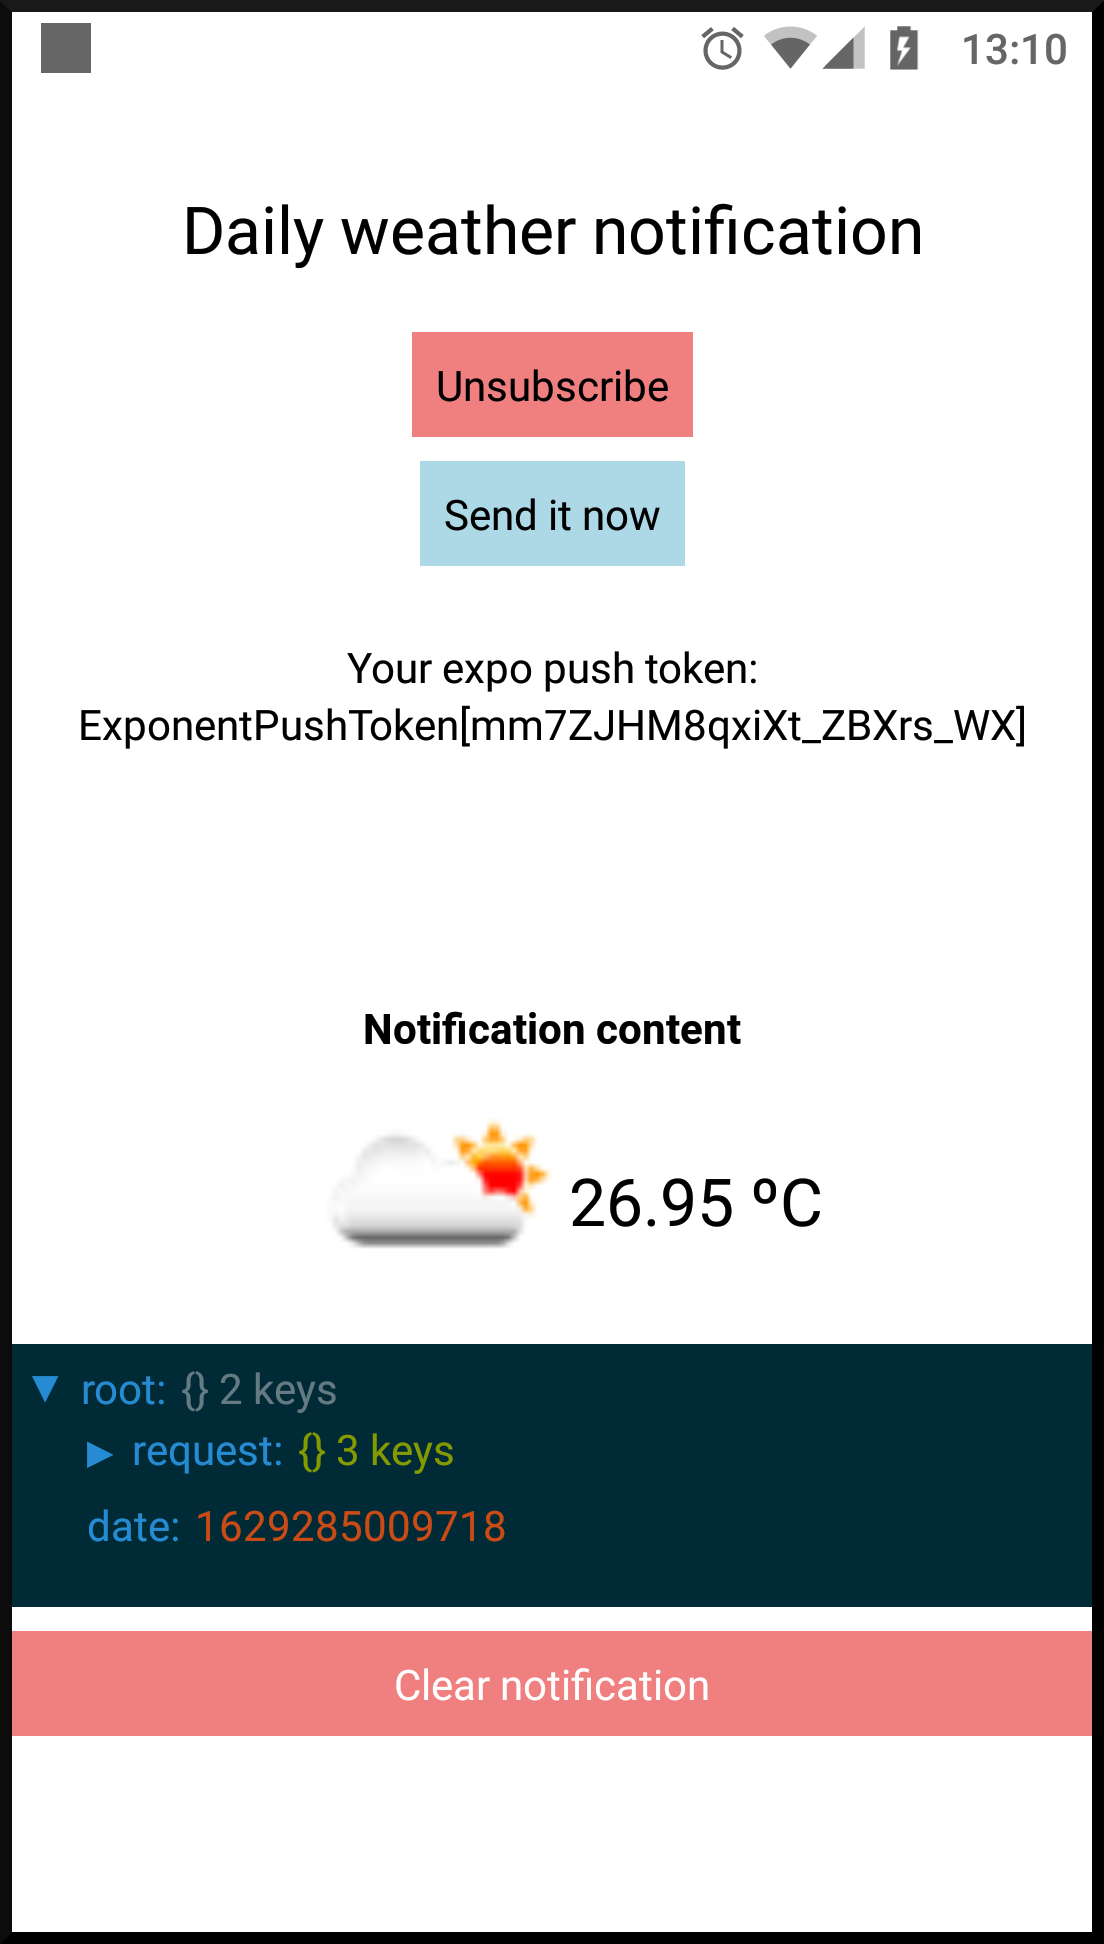
Before start coding we will need a use case for push notifications. Let's say we will create an app that allows users to subscribe to daily weather notifications. For the sake of simplicity we will start with a single city (e.g. Barcelona 🕶️) and notifications will always be sent at the same hour (e.g. 8:00 am).
Apart from the subscribe/unsubscribe buttons the app will also include a "Send" button to receive a test notification on user demand. Users will be anonymous: we will only store users' ExpoPushToken so we can identify the devices that need to be notified on the scheduled time.
Upon notification received/clicked the app will display the notification content (I'll use a JSON Viewer for illustrative purposes) and a button to clear the notification out. The ExpoPushToken is also displayed so that user can use the Expo notifications tool to send test notifications to his own device.
Because it's a demonstration only app we don't need to spend much time styling it.
Implementation: client side
Handling push notifications on Expo is fairly simple. Let's go ahead and install the Expo notifications module. We will be using this module to:
- Display received notifications. When a notification is received Expo calls thehandleNotification function parameter we pass toNotifications.setNotificationHandler to decide whether the notification must be shown to the user
- Update the app on notification received. Only if the app is foregrounded when a notification is received Expo will run the callback provided throughNotifications.addNotificationReceivedListener
- Update the app on notification clicked. When the user clicks on a notification Expo will launch the app and run the callback provided through Notifications.addNotificationResponseReceivedListener
- Get the device push token
For the following snippet to be as simple as possible I have extracted the server related functions in a separate file (i.e. server-operations.ts) and I have omitted all style tags.
We then need to tweak the app.json file a bit by adding the NOTIFICATIONS permission and setting the android.useNextNotificationsApi to true.
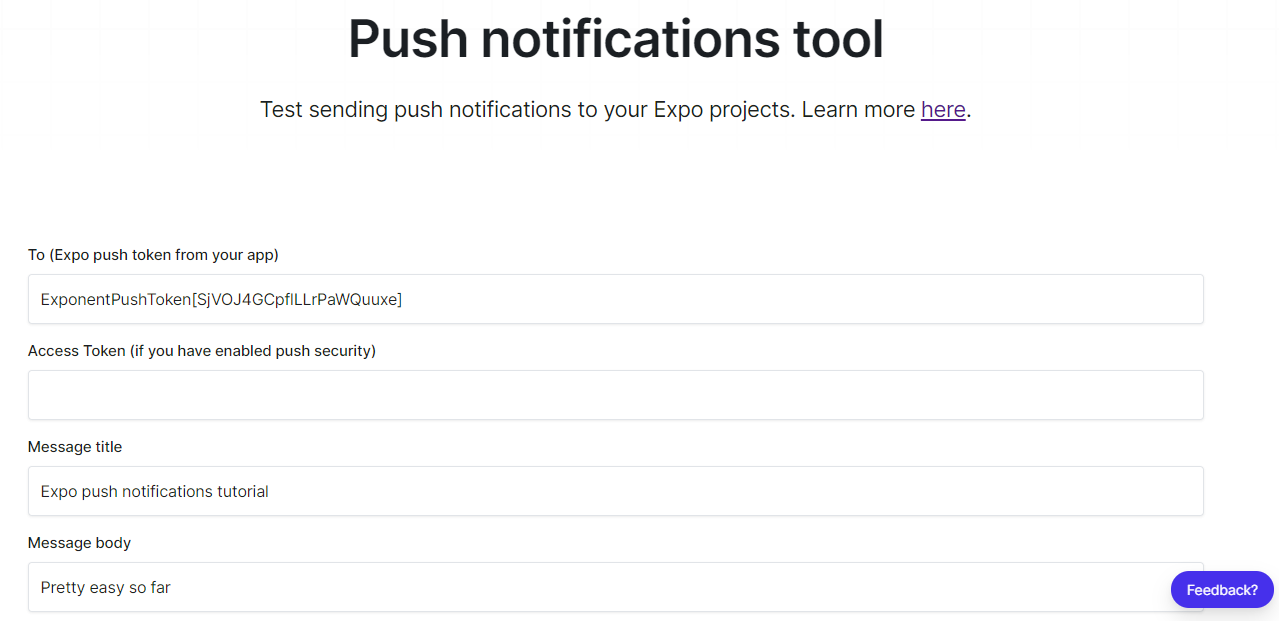
And that's all we need to get notifications working on the Expo Go client 🍾 You can test them now by using the Expo notifications tool, providing the ExpoPushToken that will be displayed in the app. Pressing the buttons on the app will not work until we implement the server side.

About server-operations.ts, notice that server related operations will depend largely on the server side choices. Here is what the operations can look like when using Firebase Realtime database and Firebase Functions on the server side (omitting error management).
Let's get ready for release now 🚀 When testing notifications in the Expo Go client we use Expo's FCM and APNs credentials but that's not going to do the trick when releasing the app. The next thing we need to do to get the push notifications working on a release version of our app (e.g. standalone version) is to configure and add both FCM and APNs credentials to the Expo app.
Configuring APNs
Since we are building on Expo it turns out to be really easy to configure APNs. All we need to do is launching the Expo credentials manager and choose from the options on the list.
Accessing credentials for <...> in project expo-notifications-tutorial
? Select platform › — Use arrow-keys. Return to submit.
❯ ios
android
? What do you want to do? › - Use arrow-keys. Return to submit.
❯ Use existing Push Notifications Key in current project
Use existing Distribution Certificate in current project
Remove Provisioning Profile
Add new Push Notifications Key
Remove Push Notification credentials
Update Push Notifications Key
Add new Distribution Certificate
Remove Distribution Certificate
Update Distribution Certificate
If you get a "CommandError: Input is required, but Expo CLI is in non-interactive mode." error you will need to use a different command line utility. In my case, developing on Windows 10, the Windows Subsystem for Linux was the only terminal that did the trick.
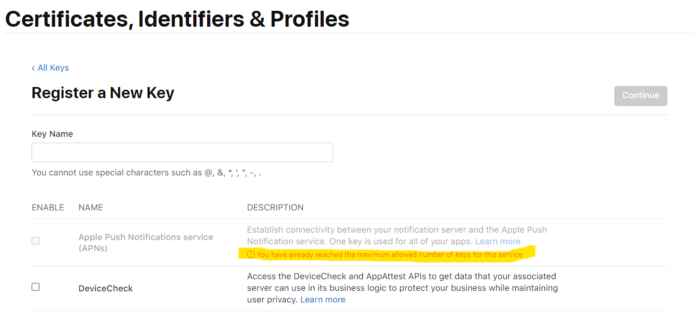
Here you will want to use an existing push notifications key for your Expo app in case you have one. Be aware that you can only have two push notifications keys for the same Apple Developer account and those keys will be used across all of your apps.
Only create a new push notification key if you don't have any for your current Apple Developer account. Trying to create a third push notification key will result in an error message both from the Expo credentials manager and the Apple Developer Portal.
CommandError:
You can have only two Apple Keys generated on your Apple Developer account.
Please revoke the old ones or reuse existing from your other apps.
Please remember that Apple Keys are not application specific!
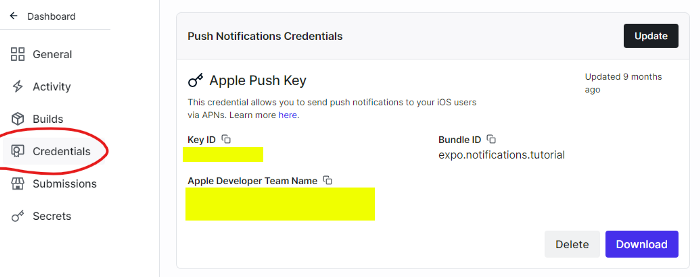
Regardless reusing an existing key or creating a new one at the end of the process you should see a similar message to the one below. You can also check the Credentials section of your app in https://expo.dev/.
You will need to rebuild the app for iOS, expo build:ios, at least once after having added the push notification key for the changes to take effect.
Configuring FCM
As stated in the Expo documentation we need to link a Firebase project to our Expo app in order to use FCM. This doesn't mean you will need to migrate your app to Firebase at all, but you do will need to create a Firebase project and add the Firebase credentials to your Expo app. Straight from this page of the Expo docs:
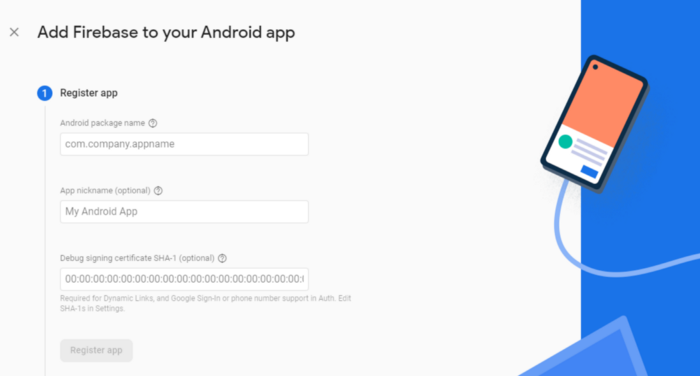
- Choose your Firebase project. Either create a new project or use an already existing one. In both cases you will need to have Firebase added to your Android app (using the android.package value of your app.json file)
- Download the google-services.json file of your Firebase app and place it in your Expo app's root directory. It's a good idea to exclude this file from source control
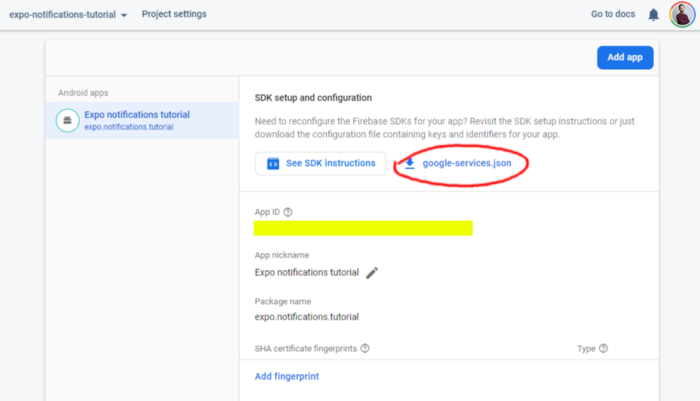
- In your app.json file add an android.googleServicesFile field with the relative path to the google-services.json file you just downloaded
- Rebuild the app for Android, expo build:android, for the changes to take effect
Skip the previous steps if you are already using Firebase in your app and you have previously added the google-services.json file.
That's all we need to do on the Expo app side but there is one more step we need to complete. Because we are using Expo notifications service instead of directly calling FCM we need to upload the Firebase project server key to Expo's servers, so Expo's service can provide the key for us when calling FCM.
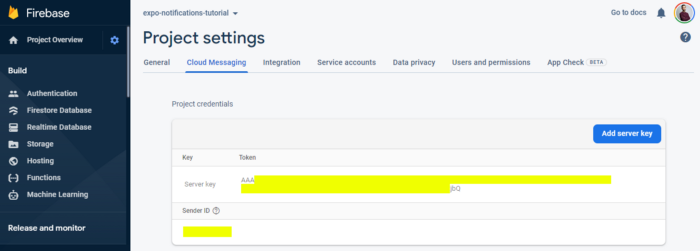
The Firebase server key can be found in Project settings > Cloud Messaging > Server key. Once you locate the server key you need to run the following command to upload it to Expo's servers:
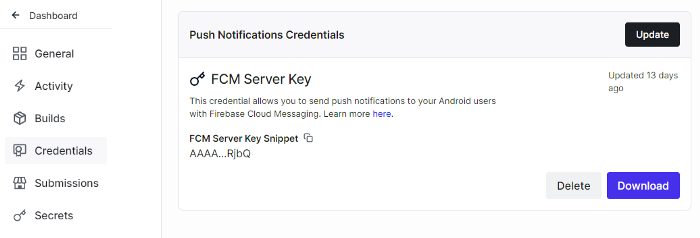
Afterwards you can again check the Credentials section of your app in https://expo.dev/ to make sure the server key has been correctly uploaded.
Implementation: server side
The most relevant task the server code needs to handle is composing and sending the push notifications. Because we are relying on Expo push notifications service we will use the Expo server SDK (the Node.js flavour since I'm coding in Typescript).
expo-server-sdk exposes a method named sendPushNotificationAsync that receives an array of message objects and schedules the delivery of those messages to the corresponding notification gateways. The message objects must be formatted according to Expo. Both things can be done in a simple function like the one below (omitting error management).
About retrieving the push tokens we need to provide to the function, it depends again on the server side choices. Sticking to Firebase Realtime database and Firebase Functions it can be done like this:
This is not a Firebase tutorial so I'm not going to explain the code above with great detail. All we need to know is that creates a Cloud Scheduler job that runs every day and notifies the subscribed users and exposes an HTTPS endpoint that can be used to send individual notifications at any time.
Finally the only missing bit is the function to get the weather data. If you are curious about it such function can be implemented as an HTTPS call to the Open Weather web API providing the name of the corresponding city:
Wrapping up
Give yourself a round of applause 👏 If you have made it this far your app should successfully be delivering push notifications on both Android and iOS devices. I'll finish this article by tackling a couple issues you might find while testing your app.
Unhandled Firebase composer notification click
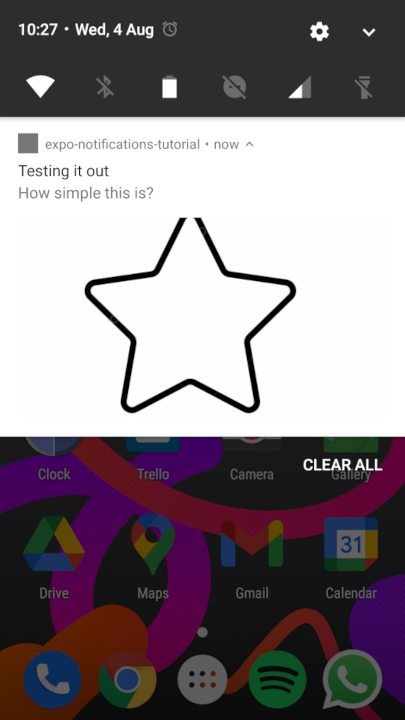
Firebase has a notification composer that can be used to send notifications to the entire audience of an app. Sending notifications through this graphical tool will indeed deliver notifications to all the users of our app (on Android devices at least; I haven't tested it on iOS).
An unpleasant surprise appears when clicking on the notification however: the app opens but Expo notification handlers are not fired, causing the notification click to be missed 😢 At first it might look like an Expo bug but after reading through the Expo's repository issues we discover it's actually the expected behavior.
As explained in this comment there are two types of FCM notifications: data messages and notification messages. Having a look at the provided Firebase documentation page we find the cause of the problem:
Notification messages, sometimes thought of as "display messages." These are handled by the FCM SDK automatically.
Data messages, which are handled by the client app.
So no room for Expo to handle the Firebase composer notifications. We will have to live with that and write some more code for the cases in which we need to notify the entire audience of the app.
Unhandled notification click on app launch (on Android)
In the code above we are defining the notifications handlers from a useEffect inside the App component given we need React to update the app to display the content of the received notifications.
There's nothing wrong with it but, as explained in this github issue, if the handlers are not defined as soon as possible upon app launch the notification click might go unnoticed when launching the app from closed state. That's exactly what occurs now when clicking on a notification while the app is in closed state.
Luckily this issue can be worked around. A simple way is to define stub notification handlers on app launch, outside any component, and define the the actual handlers' behavior later on (e.g. from a useEffect inside a component). The catch to this approach is that stub handlers allow us to track notifications received before the actual handler's behavior is defined.
Looks easier than it sounds and, elegant or not, it works 💪:
And that's the end of it! You can find all the source code you might need to check in this repository. Happy coding 🥳