You are authenticating your Expo app users with email and password using Firebase. It works great but marketing funnels seem to indicate that users quit the app at the sign up screen. Looks like offering social sign options will help mitigate that problem, so says the marketing department, and you now want to add Apple sign-in and Google sign-in to your app. This is how to do it in February 2021!
To follow along with this story you need to meet this two requirements. You can check how to do so in Email authentication in React Native apps using Firebase:
- Have an existing Firebase project with Authentication enabled
- Handle successful user authentication through Firebase onAuthStateChanged listener
Firebase limitations in React Native
The Firebase Javascript SDK has an specific method called signInWithPopup to handle authentication providers' sign-in flow using OAuth. Relaying on the Firebase Apple authentication documentation page will instruct us to handle the sign-in flow in the following fashion:
Using this approach in React Native apps will raise an exception however. This happens because the Firebase Javascript SDK is designed for web applications and the signInWithPopup method expects the app to run in a browser. Frog! We will need to find another way to do it.
Fortunately for us we are using Expo 🎉 and Expo has two modules designed for this specific purpose: expo-google-app-auth and expo-apple-authentication. Both modules authenticate the user against the corresponding provider and return a credential that can be used to authenticate the user in Firebase through the signInWithCredential method.
In fact Expo provides two modules to authenticate users against Google: expo-google-app-auth and expo-google-sign-in. They both achieve the same goal but the latter uses native Google authentication while the former uses a secure system web browser. At practice this means that expo-google-sign-in requires a bit more configuration and it doesn't work in the Expo Go client. Feel free to use the one you like better.
Having set the strategy it's just a matter of completing the necessary steps for each of the two modules. Let's go one by one.
Sign in with Google
Go ahead and install expo-google-app-auth. We will then use the straightforward logInAsync method to get the users' credentials. This method needs at least three parameters: androidStandaloneAppClientId, iosStandaloneAppClientId, and scopes.
The first two are OAuth 2.0 Client IDs that are automatically generated by Firebase when you activate the corresponding authentication providers while the third is a list of OAuth 2.0 scopes. Let's enable Google authentication provider and get our client IDs before moving into the code.
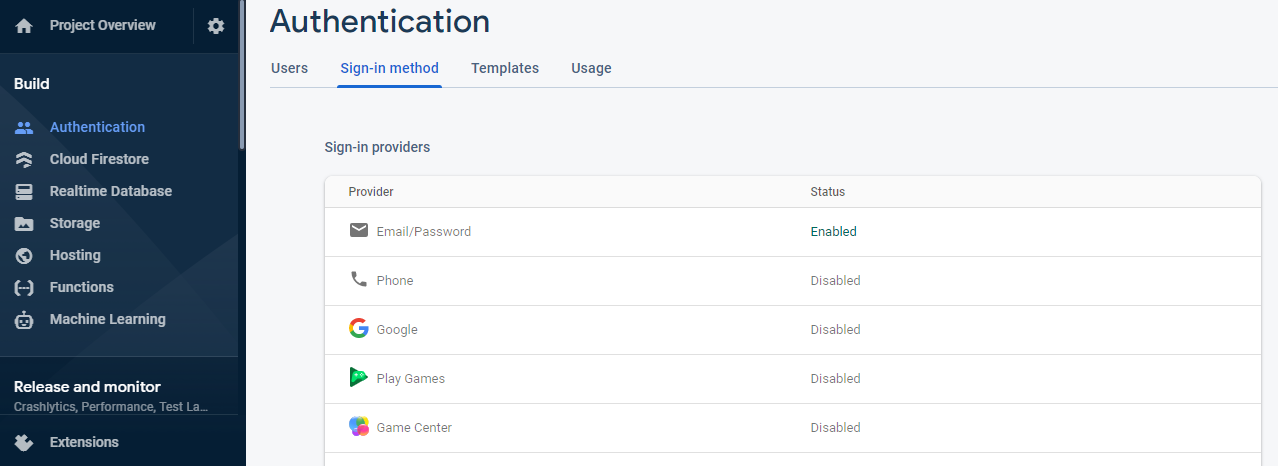
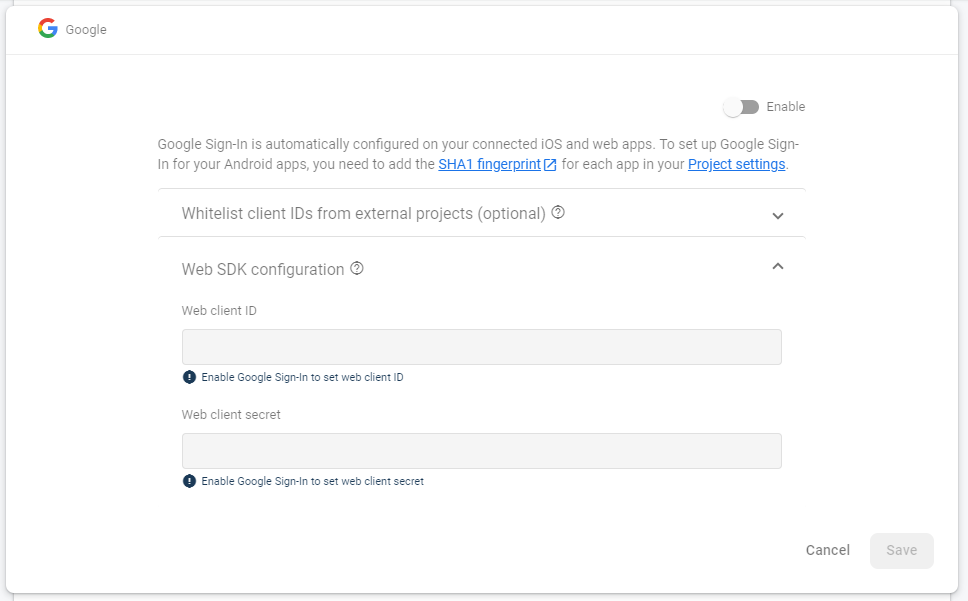
Navigate to Authentication > Sign-in method and enable Google. After saving the changes the Web client ID and Web client secret fields will get populated but this is not the Client ID we are looking for.
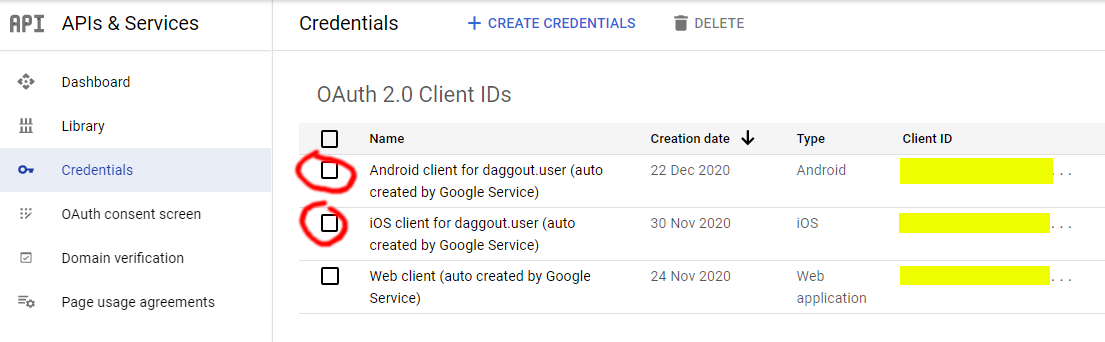
The client ID we need is generated after enabling the Google sign-in method and can be found in the corresponding Google Cloud Platform project. Go to https://console.cloud.google.com/, select the Firebase project (every Firebase project creates an associated GCP project) and navigate to APIs & Services >Credentials. There you will see a list of OAuth 2.0 Client IDs:
Great! Now let's drop those client IDs into some code 💪 You might want to create environment variables for the client IDs instead of including them in the source code but I'm not doing so here for the sake of simplicity.
The logInAsync call returns a promise with the result of the operation. If the result type equals The success we will then find the idToken and accessToken in the result, which we will use to authenticate the user in Firebase by creating a GoogleAuthProvider credential. If the result equals cancel means the user didn't complete the sign-in flow. Easy as 1,2,3!
Keep in mind that the code above will not work on the Expo Go client. You can either create a new Internal testing release on Google Play console and install the app on an Android device or generate new OAuth 2.0 Client IDs for testing purposes and pass them to logInAsync using the androidClientId and iosClientId parameters (in which case you will need 4 client IDs).
Sign in with Apple
Before starting configuring the Apple sign-in service I suggest you to read this helpful story from Dan Singer. There you will find some considerations that must be taken into account before adding the Apple sign-in into an Expo app, along with the explanation on how to do it. In this story I'll be extending his tutorial with more detail.
It comes as no surprise that Apple's sign-in is more complicated than Google's one and it can be tempting to skip it. Apple won't make so easy though. As stated in this section of the App Store Review Guidelines, "apps that use social login services (e.g. Google sign-in) must also offer Sign in with Apple as an equivalent option". So let's make our best to get it working!
First we need to install the necessary modules: expo-apple-authentication and expo-crypto. We will use the signInAsync method from the expo-apple-authentication module to, just as we did before, get the user's credentials and then authenticate the user in Firebase using those credentials.
The difference this time is that signInAsync does not return an OAuth access token. As Dan Singer points in his story, we can get around this issue by providing a SHA256-hashed nonce to the signInAsync function and then pass the original nonce to Firebase's signInWithCredential. That's why we also need the expo-crypto module. Let's put it all together:
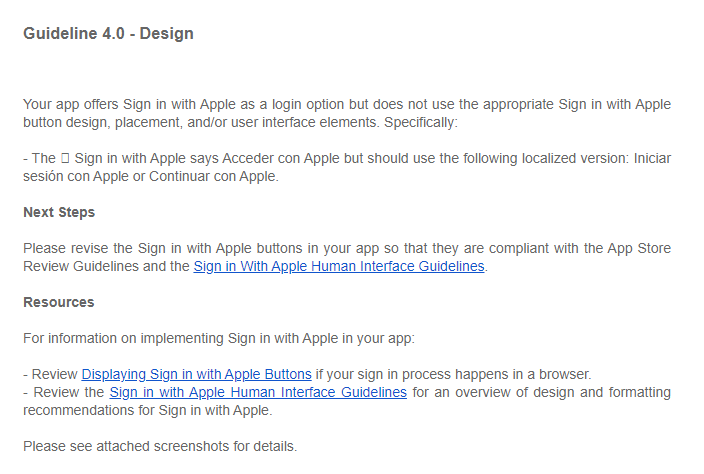
The requestedScopes parameter is a list of OAuth 2.0 scopes. Not that complicated after all! Next thing we need to care about is the UI. While Google let's you display their sign-in button the way you want Apple will require you to use a guideline approved button. In fact it's normal to get rejected because the sign in button doesn't meet the requirements.
The simplest way to prevent the rejection is to use the "corporative" button Expo provides for us. Keep in mind that Apple sign-in only works on iOS devices so we need to check whether it's available or not before rendering the button. Expo gets us covered with the isAvailableAsync method:
Well! Having the code in place we can now move on to configuring the services. Let's start with Apple and we will tackle Firebase afterwards. Expo team did a great job documenting the necessary steps in the expo-apple-authentication page so make sure to take a look at it.
First add the usesAppleSignIn property to your app.json configuration file. Then head to Apple Developer Portal to do the following two things:
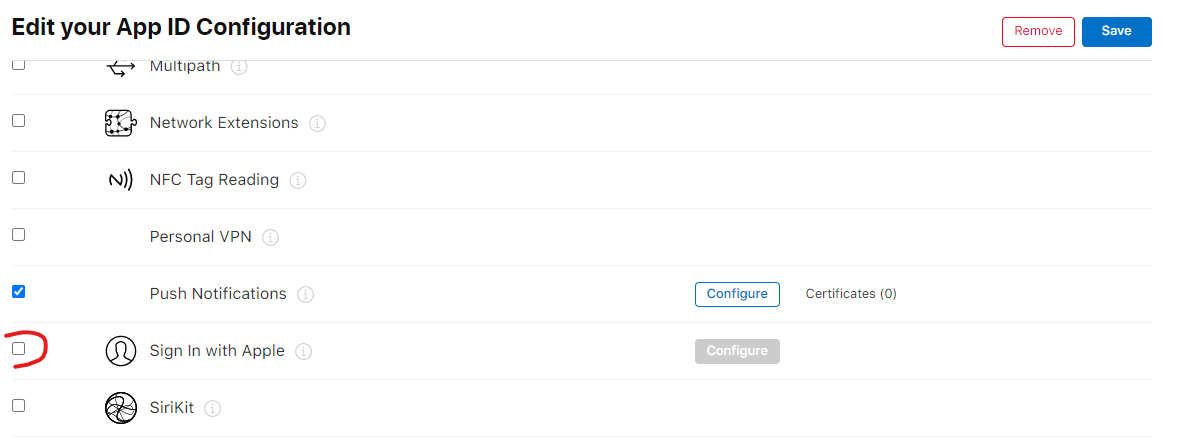
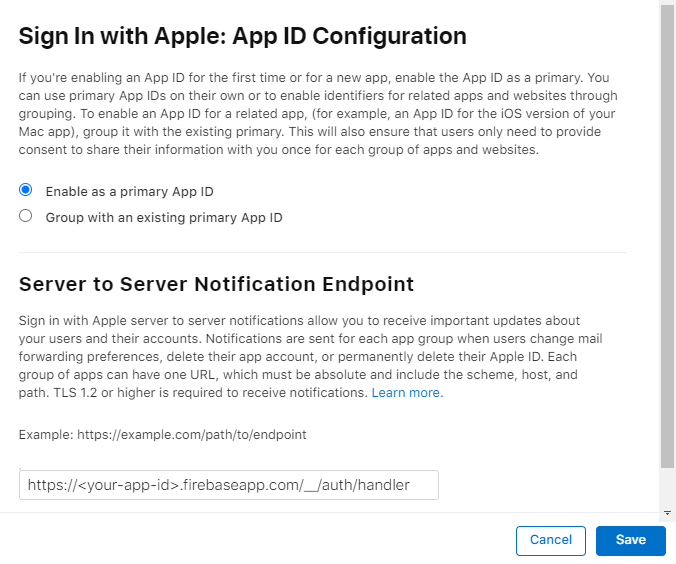
- Enable the Sign In with Apple capability for your App ID. Navigate to Certificates, IDs & Profiles > Identifiers and select your App ID. In the Capabilities list select Sign In with Apple and click Configure. Leave the Enable as a primary App ID option selected and provide the Return URL for your Firebase app (step 1 in the Firebase Apple Auth documentation page)
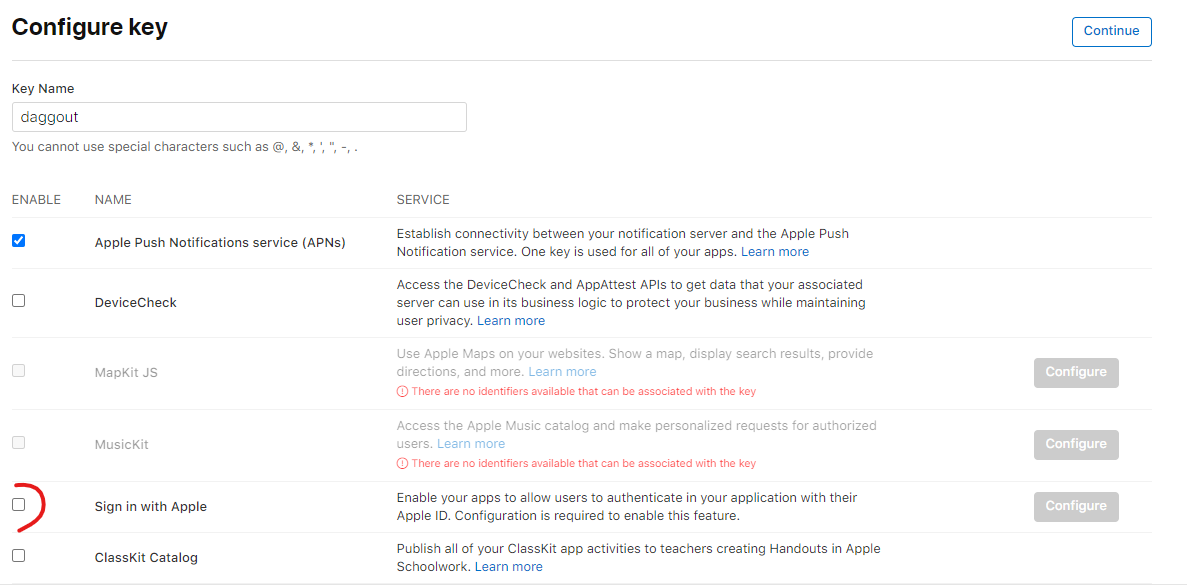
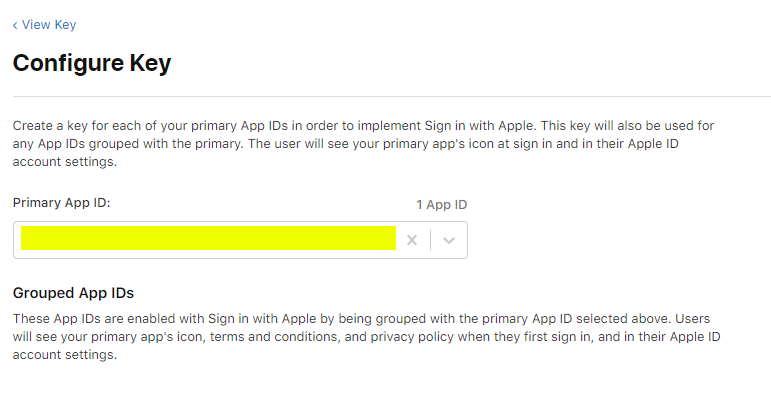
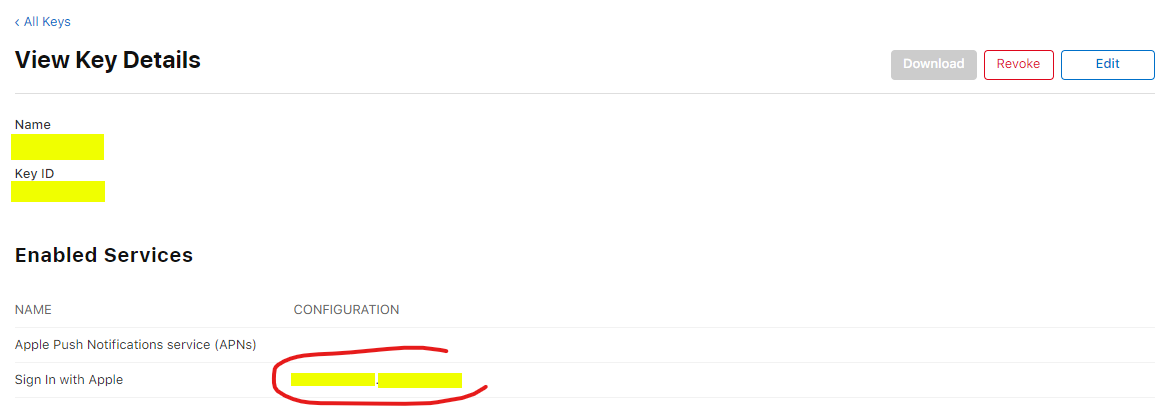
- Enable the Sign In with Apple service in your app private key. If your app doesn't use a private key yet you will need to create a new one. Navigate to Certificates, IDs & Profiles > Keys and select your key. Click Edit, select the Sign in with Apple service and click Configure. In the list of Primary App IDs select the ID of your app.
We are done with Apple 💃 Notice that we modified the App ID configuration and that will invalidate the app Provisioning Profile. Fortunately we can easily generate a new Profile as well as revoke the old one thanks to Expo by using a couple command line arguments next time we build the app:
We are almost there! We only need to enable Apple authentication provider in Firebase and will have arrived to our destination: success. Head to the Firebase console, navigate to Authentication > Sign-in method and enable Apple.
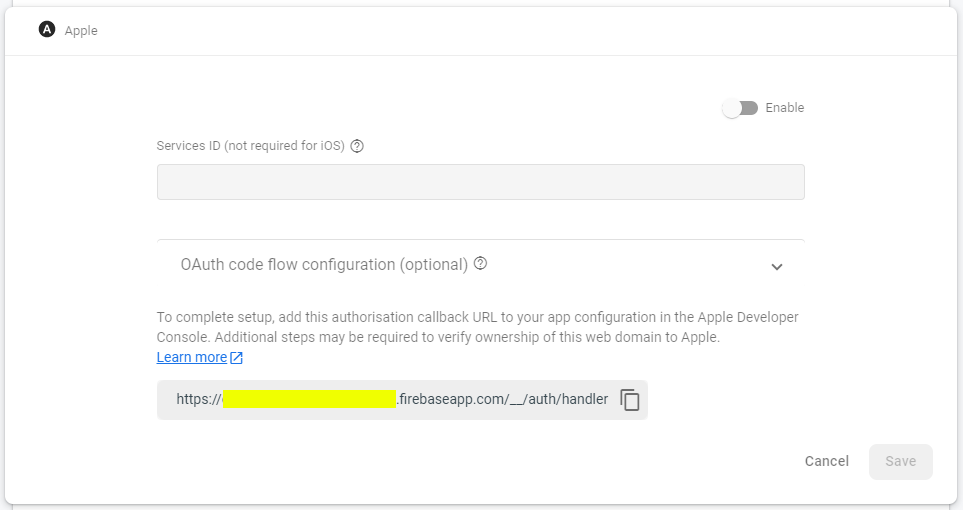
In the Services ID field you will need to provide the ID of the Sign In with Apple service you've enabled in the app private key. You can find the Service ID in the Apple Developer Portal navigating to Certificates, IDs & Profiles > Keys and selecting your key. Next to the Sign In with Apple enabled service you will find the ID which looks like {TeamID}.{Bundle ID}.
The OAuth code flow configuration section is optional and I'm not sure it makes a difference to fill in the details or not. Given you only need your Apple Team ID and your app's private key I prefer to provide them but, again, I'm not sure it makes a difference. Feel free to skip this part and test your luck 🤞

You can download your private key (a .p8 format file) from the Apple Developer Portal but you can only do it once. If you let Expo handle the process back in the day then you probably won't be able to download the key. You can manually generate a new key from the Apple Developer Portal and then use expo credentials:manager to replace the private key your app uses.
Save the changes, head to the command line to generate a new .ipa in case you haven't done it above and that's all there is 🎉 Wait for the new app version to be available in TestFlight and delight yourself with the wonders of the 21st century state-of-the-art authentication. Happy coding!